Unlock Remote Access: Raspberry Pi SSH Guide (No Port Forwarding!)
Ever found yourself wanting to tweak your Raspberry Pi while lounging on the couch, or perhaps troubleshoot a project from a coffee shop miles away? Gaining remote access to your Raspberry Pi, especially when it's tucked away behind a Network Address Translation (NAT) router, is not just a convenience; it's a superpower for any tech enthusiast.
Imagine the possibilities: controlling your home automation system while on vacation, monitoring sensor data from a remote weather station, or even collaborating on a robotics project with a team spread across different continents. The key to unlocking this potential lies in mastering the art of SSH (Secure Shell) - and particularly, learning how to navigate the challenges of NAT routers that often stand in the way. This guide serves as your comprehensive roadmap to achieving seamless, secure remote access to your Raspberry Pi, regardless of your location or network configuration.
| Category | Information |
|---|---|
| Basic Information | |
| Device Type | Raspberry Pi (various models) |
| Operating System | Raspberry Pi OS (formerly Raspbian), Linux-based |
| Typical Use Cases | Home automation, media server, IoT projects, learning Linux, robotics, remote monitoring |
| Network Configuration | |
| Network Setup | Typically connected to a local network behind a NAT router |
| IP Addressing | Dynamic IP address assigned by the router (DHCP) or static IP address configuration |
| Common Challenges | Accessing the Pi from outside the local network due to NAT and firewalls |
| SSH (Secure Shell) | |
| Protocol | SSH (Secure Shell) |
| Function | Provides a secure, encrypted connection for remote command-line access |
| Default Port | 22 (can be changed for security) |
| Remote Access Methods | |
| Port Forwarding | Configuring the router to forward external port 22 (or a custom port) to the Pi's internal IP address and port 22 |
| VPN (Virtual Private Network) | Creating a secure tunnel between your device and your home network |
| Reverse SSH Tunneling | Establishing an SSH connection from the Pi to a publicly accessible server, allowing you to connect back to the Pi |
| Tailscale | A mesh VPN that simplifies network configuration and provides secure access to devices |
| SocketXP | A solution that provides remote access to IoT devices behind NAT routers without port forwarding |
| Security Considerations | |
| Password Security | Use strong, unique passwords or SSH keys for authentication |
| Firewall Configuration | Configure the Pi's firewall (e.g., `ufw`) to allow only necessary connections |
| Regular Updates | Keep the Raspberry Pi OS and installed software up to date to patch security vulnerabilities |
| Tools and Software | |
| OpenSSH | The standard SSH server and client software |
| PuTTY | A popular SSH client for Windows |
| Terminal (macOS, Linux) | Built-in SSH client |
| ufw (Uncomplicated Firewall) | A user-friendly firewall management tool for Linux |
| Additional Resources | |
| Raspberry Pi Documentation | Official documentation for Raspberry Pi hardware and software |
| Online Forums | Raspberry Pi forums and communities for troubleshooting and support |
| Security Best Practices | Guides and articles on securing Raspberry Pi devices |
| Raspberry Pi Official Documentation |
Let's start with the fundamentals. What exactly is SSH, and why is it so crucial for remote Raspberry Pi management? SSH, short for Secure Shell, is a network protocol that allows you to securely access and control a remote computer over an unsecured network. Think of it as a digital tunnel that encrypts all communication between your computer and the Raspberry Pi, protecting your data from prying eyes. Without SSH, any commands or data you send to your Pi could be intercepted and potentially compromised. This is why it's the cornerstone of secure remote administration.
- Unlock Cinematic Success The 5 Movie Rules For 2024 And Beyond
- Filmyfly Xyz 2025 Hindi Dubbed Your Ultimate Source For Entertainment
Now, let's talk about NAT routers. A NAT (Network Address Translation) router sits between your home network and the internet. Its primary job is to translate the single public IP address assigned to your home network by your internet service provider (ISP) into private IP addresses for each device within your network (like your Raspberry Pi, computers, and smartphones). This allows multiple devices to share a single public IP address, saving valuable IP address space and adding a layer of security. However, this also creates a barrier to direct incoming connections from the internet to devices within your local network. When you try to connect to your Raspberry Pi from outside your home network, the NAT router doesn't know which device to forward the connection to. This is where the challenge of remote SSH access comes in.
One of the most common methods for overcoming the NAT barrier is port forwarding. This involves configuring your router to forward incoming connections on a specific port (usually port 22 for SSH, but it's highly recommended to change this for security reasons) to the internal IP address of your Raspberry Pi. Here's how it generally works:
- Access your router's configuration page: This usually involves typing your router's IP address (often 192.168.1.1 or 192.168.0.1) into your web browser. You'll need the router's username and password to log in.
- Find the port forwarding section: The location of this section varies depending on your router's make and model, but it's often found under "Advanced Settings," "Firewall," or "NAT."
- Create a new port forwarding rule: You'll need to specify the following:
- Service Name/Description: A descriptive name for the rule (e.g., "Raspberry Pi SSH").
- Port Range: The external port you want to use (e.g., 50022 remember, it's best to use a non-standard port for security).
- Internal IP Address: The private IP address of your Raspberry Pi (e.g., 192.168.1.100).
- Internal Port: The port on your Raspberry Pi that SSH is listening on (usually 22).
- Protocol: TCP.
- Save the rule: Make sure to save the changes and restart your router if necessary.
Once you've configured port forwarding, you can connect to your Raspberry Pi from outside your network using your public IP address and the external port you specified. You can find your public IP address by simply searching "what is my ip" on Google.
- Unleashing The Power Of Filmyzilla Bengali Movie Downloads And Mp4moviez
- Kannada Movies 2025 Latest Releases Movierulz What You Need To Know
For example, if your public IP address is 123.45.67.89 and you forwarded external port 50022 to your Raspberry Pi, you would use the following SSH command:
ssh pi@123.45.67.89 -p 50022Remember to replace "pi" with your Raspberry Pi's username.
While port forwarding is a relatively straightforward method, it does have some drawbacks. Firstly, it exposes your Raspberry Pi's SSH port directly to the internet, which can increase the risk of security breaches. Secondly, if your public IP address is dynamic (meaning it changes periodically), you'll need to update the port forwarding rule whenever your IP address changes. This can be a hassle, especially if you're away from home.
A more secure and convenient alternative to port forwarding is using a Virtual Private Network (VPN). A VPN creates an encrypted tunnel between your device and your home network, allowing you to access your Raspberry Pi as if you were on the same local network. There are two main approaches to using a VPN for Raspberry Pi remote access:
- Setting up a VPN server on your home router: Some routers have built-in VPN server functionality. If your router supports this, you can configure it to allow VPN connections from your devices. This is generally the most secure option, as the VPN server is directly integrated into your network's gateway.
- Installing a VPN server on your Raspberry Pi: You can install VPN server software like OpenVPN or WireGuard directly on your Raspberry Pi. This turns your Pi into a VPN server, allowing you to connect to your home network through it. While this option is more flexible, it also requires more technical expertise to set up and maintain.
Once you've set up a VPN server, you can connect to it from your computer or smartphone using a VPN client application. After connecting, you'll be able to access your Raspberry Pi using its internal IP address, just as if you were on the same local network.
Another clever technique for bypassing NAT routers is reverse SSH tunneling. This involves establishing an SSH connection from your Raspberry Pi to a publicly accessible server, which then allows you to connect back to the Pi through that server. This approach is particularly useful when you don't have control over the router's configuration, such as when you're behind a restrictive firewall.
Here's the general process:
- Rent or set up a publicly accessible server: You'll need a server with a public IP address that you can SSH into. This could be a VPS (Virtual Private Server) from a provider like DigitalOcean, AWS, or Linode.
- Establish a reverse SSH tunnel from your Raspberry Pi: On your Raspberry Pi, run the following command:
ssh -R 2222:localhost:22 user@your_server_ipReplace "2222" with an available port on your server, "localhost" with the hostname of your Raspberry Pi (usually localhost), "22" with the SSH port on your Raspberry Pi, "user" with your username on the server, and "your_server_ip" with the public IP address of your server.
Connect to your Raspberry Pi through the server: On your computer, SSH into your server:ssh user@your_server_ipThen, from the server, connect to your Raspberry Pi using the reverse tunnel:
ssh -p 2222 localhostThis will forward the SSH connection from your computer to the server, and then from the server back to your Raspberry Pi through the reverse tunnel.
In recent years, several tools have emerged that simplify the process of remote Raspberry Pi access, particularly when dealing with NAT routers and firewalls. Two popular solutions are Tailscale and SocketXP.
Tailscale is a mesh VPN that creates a secure, private network between your devices, regardless of their location. It uses WireGuard under the hood for encryption and performance, but it handles all the complex configuration automatically. To use Tailscale with your Raspberry Pi:
- Install Tailscale on your Raspberry Pi: Follow the instructions on the Tailscale website to install the Tailscale client on your Raspberry Pi.
- Authenticate your device: Once installed, Tailscale will generate a URL that you can open in your browser to log in with your Tailscale account. This links your Raspberry Pi to your Tailscale network.
- Connect to your Raspberry Pi: After authentication, your Raspberry Pi will be assigned a Tailscale IP address. You can then use this IP address to SSH into your Pi from any device that's also connected to your Tailscale network.
Tailscale eliminates the need for port forwarding or complex VPN configurations, making it a very user-friendly option.
SocketXP is another solution that focuses specifically on remote access to IoT devices behind NAT routers. It uses a reverse proxy architecture to establish a secure connection between your device and the internet without requiring any port forwarding or firewall changes. To use SocketXP:
- Download and install the SocketXP agent on your Raspberry Pi: You can download the agent from the SocketXP website.
- Configure the agent: Follow the instructions to configure the agent with your SocketXP account credentials.
- Establish a remote SSH connection: SocketXP will provide you with a unique URL or command that you can use to connect to your Raspberry Pi's SSH shell from anywhere in the world.
SocketXP is particularly well-suited for scenarios where you need to provide remote access to a large number of IoT devices without having to configure each device individually.
Regardless of the method you choose, it's crucial to prioritize security when setting up remote SSH access to your Raspberry Pi. Here are some essential security measures to take:
- Change the default SSH port: As mentioned earlier, the default SSH port (22) is a common target for attackers. Changing it to a non-standard port (above 1024) can significantly reduce the risk of brute-force attacks. You can change the SSH port by editing the `/etc/ssh/sshd_config` file and modifying the "Port" directive.
- Disable password authentication: Password authentication is vulnerable to brute-force attacks. A much more secure alternative is to use SSH keys. SSH keys are cryptographic key pairs that allow you to authenticate without entering a password. To set up SSH keys:
- Generate an SSH key pair on your computer using the `ssh-keygen` command.
- Copy the public key to your Raspberry Pi using the `ssh-copy-id` command.
- Disable password authentication in the `/etc/ssh/sshd_config` file by setting `PasswordAuthentication no`.
- Use a strong firewall: A firewall acts as a barrier between your Raspberry Pi and the outside world, blocking unauthorized connections. The `ufw` (Uncomplicated Firewall) is a user-friendly firewall management tool that's available on most Linux distributions. To enable `ufw`, run the following commands:
sudo ufw enable sudo ufw default deny incoming sudo ufw allow sshThis will enable the firewall, deny all incoming connections by default, and allow SSH connections.
- Keep your system up to date: Regularly update your Raspberry Pi OS and installed software to patch security vulnerabilities. You can do this by running the following commands:
sudo apt update sudo apt upgrade - Monitor SSH logs: Regularly check the SSH logs (usually located in `/var/log/auth.log`) for suspicious activity, such as failed login attempts.
Beyond basic SSH access, you might want to explore other remote access options for your Raspberry Pi, such as VNC (Virtual Network Computing) or RDP (Remote Desktop Protocol). These protocols allow you to access the graphical desktop of your Raspberry Pi remotely, which can be useful for tasks that require a graphical interface.
To enable VNC on your Raspberry Pi, you can use the built-in RealVNC server. To install and configure RealVNC, follow these steps:
- Enable VNC in Raspberry Pi Configuration: Open the Raspberry Pi Configuration tool (either through the graphical interface or by running `sudo raspi-config` in the terminal), go to the "Interfaces" tab, and enable VNC.
- Download and install a VNC client on your computer: Download a VNC client such as RealVNC Viewer or TigerVNC.
- Connect to your Raspberry Pi: Use the VNC client to connect to your Raspberry Pi's IP address. You'll be prompted for your Raspberry Pi's username and password.
RDP (Remote Desktop Protocol) is another option for accessing the graphical desktop of your Raspberry Pi remotely. To enable RDP, you'll need to install an RDP server on your Raspberry Pi, such as xrdp:
- Install xrdp: Run the following command in the terminal:
sudo apt install xrdp - Connect to your Raspberry Pi: Use an RDP client (such as Microsoft Remote Desktop) to connect to your Raspberry Pi's IP address. You'll be prompted for your Raspberry Pi's username and password.
Whether you choose SSH, VNC, or RDP, remember to secure your remote access connections using the security measures outlined earlier in this guide.
Gaining remote access to your Raspberry Pi opens up a world of possibilities for home automation, IoT projects, remote monitoring, and much more. By understanding the challenges of NAT routers and firewalls, and by implementing appropriate security measures, you can unlock the full potential of your Raspberry Pi and control it from anywhere in the world.
Remember that command line access through SSH gives control of your Raspberry Pi from another computer. Tools like `scp` allow you to securely copy files between your local machine and the Raspberry Pi. For example, to copy a file named `myfile.txt` from your computer to the `pi` user's home directory on the Raspberry Pi, you would use the following command:
scp myfile.txt pi@your_raspberry_pi_ip:/home/pi/Replace `your_raspberry_pi_ip` with the actual IP address of your Raspberry Pi, whether it's the local IP address or the Tailscale IP address.
These methods described here provide command line based access, which is often sufficient for many tasks. But, remember enabling ssh during initial setup, finding your pis ip address on the local network is the basic and powerful way to connect to your device remotely.
Remotely accessing a Raspberry Pi behind a NAT router isn't just about convenience; it's about empowering innovation. By mastering these techniques, you can transform your Raspberry Pi from a simple single-board computer into a powerful tool for remote management, automation, and experimentation. Whether you're a seasoned developer or a curious hobbyist, the ability to securely connect to your Raspberry Pi from anywhere in the world will undoubtedly unlock new possibilities and inspire your next great project.
- Hd Hub 4 U Know Before You Stream Ndash What You Need To Know
- Discover The Ultimate Experience With Downloadhub In Your Digital World
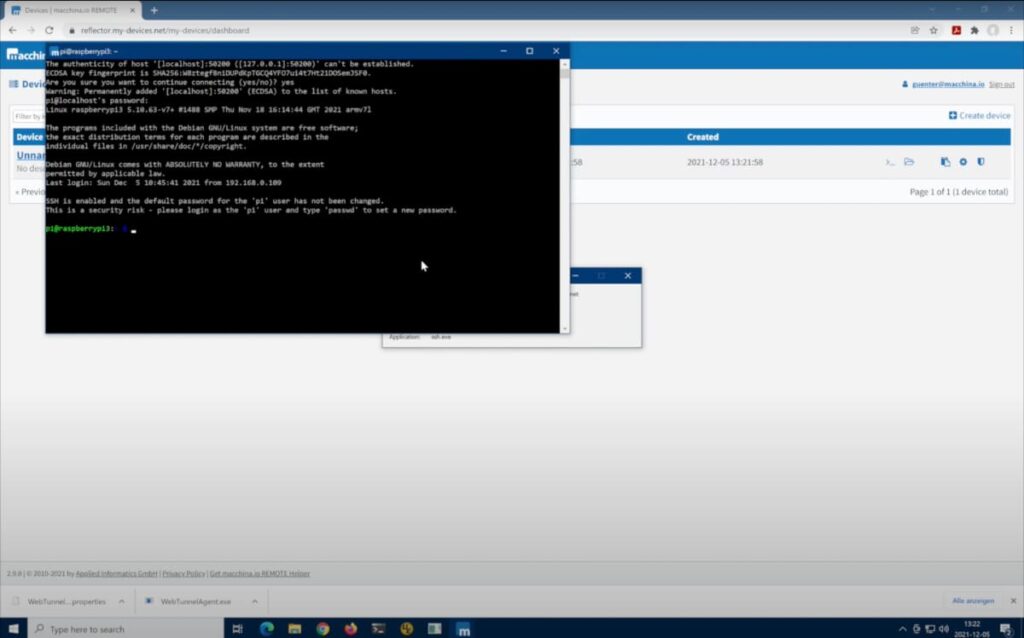
Video Getting Started with macchina.io REMOTE SSH into a remote

How to SSH Into a Raspberry Pi for Remote Access

How To Access RemoteIoT Behind Router Raspberry Pi Free Download A
